Although Art Flick may not have been the first to use stripped hackle quill on dry flies, he certainly popularized it in his Red Quill. For his Red Quill he used a large stripped hackle from a Rhode Island Red. To prevent quill from cracking, he soaks it in water overnight. Let's see how to tie this fly!
Dressing:
Hook - Sprite S1401 #12
Thread - Semperfli Waxed Thread 12/0
Tail - Root River Dun Rooster Fibers
Body - Brown Rooster Quill
Wings - Lemon Wood Duck
Hackles - Root River Dun Hackle
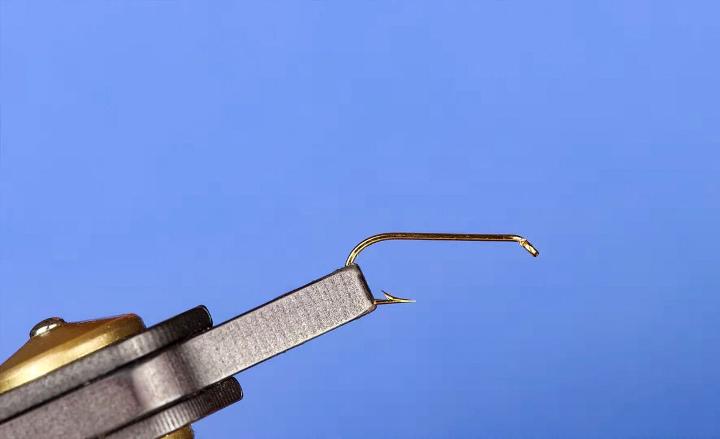
1. Secure your dry fly hook in the vise, as shown, with the hook shank horizontal. For this fly i used a Sprite Dry Fly Bronze Hook #12.
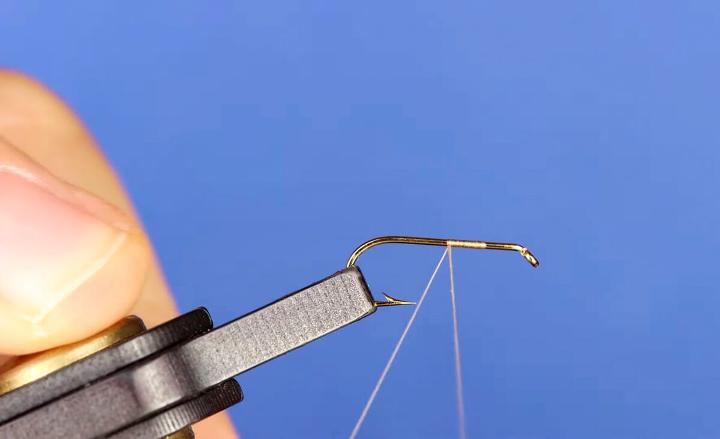
2. Run a tiny foundation of tying thread along the hook shank, i mostly use Semperfli Waxed Thread 12/0.
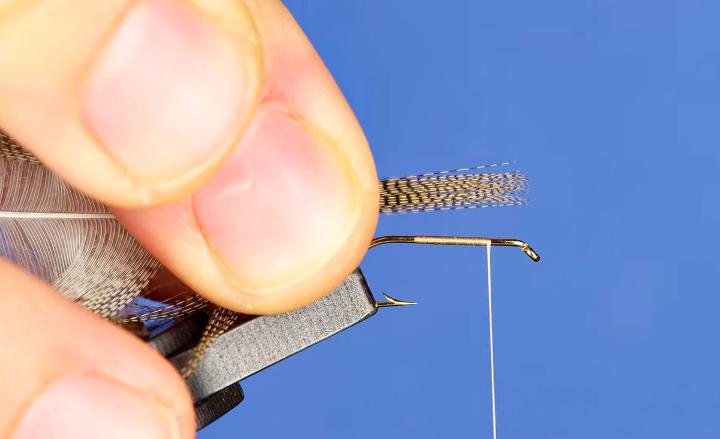
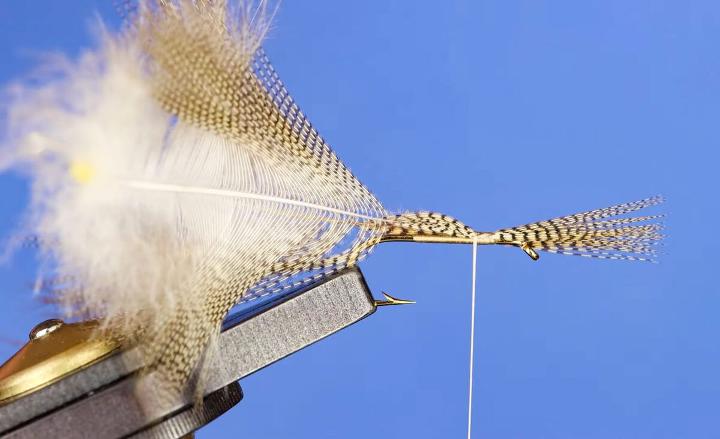
3. Select two Lemon Wood Duck feathers to form the wings. Put them back to back on the convex side. If you want to know how to do this, check out the full video here. Measure the feathers against the hook, they must be as long as the entire length of the hook without the eye.
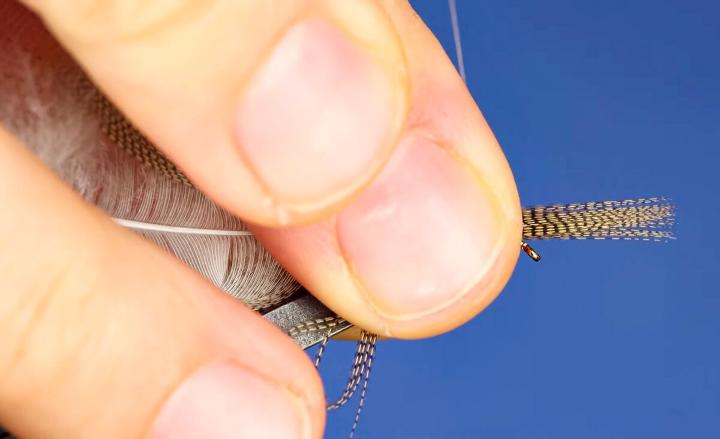 4. Tie wings up to the correct position on the thorax and secure with a couple of turns of tying thread. I always tie wood duck wings a little bit long, in order to have the possibility to pull them back to the right measure. No chances to do that in the opposite way, feathers cannot be pushed forward, because of the micro-barbs present on the lemon wood duck fibres. When you are sure of the length, secure with a few more turns of thread.
 5. When wings are well secured you can go to the next step.
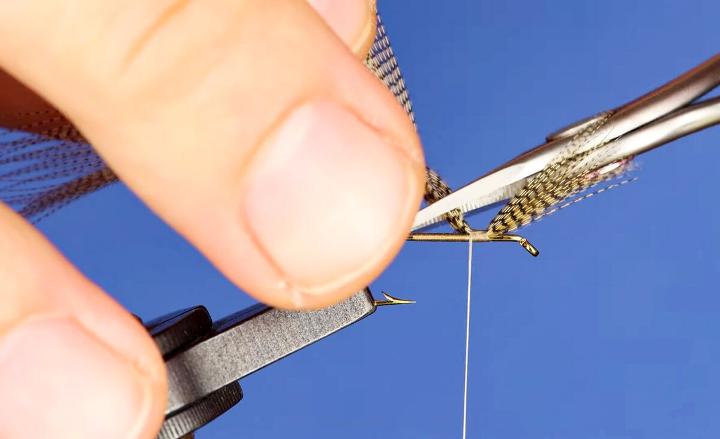 6. Cut away material in excess.
 7. Divide the two feathers keeping them totally separated one from each other.
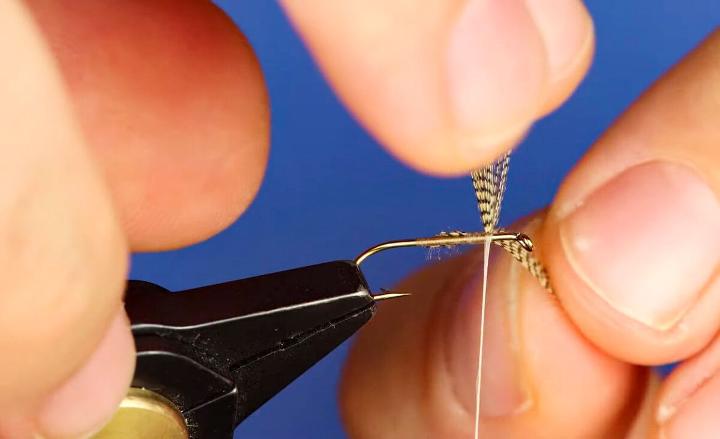
 8. Make a figure eight around the wings with the tying thread. Do some turns on each single wing to set them perpendicular and well separated.
2. Run a tiny foundation of tying thread along the hook shank, i mostly use Semperfli Waxed Thread 12/0.
3. Select two Lemon Wood Duck feathers to form the wings. Put them back to back on the convex side. If you want to know how to do this, check out the full video here. Measure the feathers against the hook, they must be as long as the entire length of the hook without the eye.
4. Tie wings up to the correct position on the thorax and secure with a couple of turns of tying thread. I always tie wood duck wings a little bit long, in order to have the possibility to pull them back to the right measure. No chances to do that in the opposite way, feathers cannot be pushed forward, because of the micro-barbs present on the lemon wood duck fibres. When you are sure of the length, secure with a few more turns of thread.5. When wings are well secured you can go to the next step.6. Cut away material in excess.7. Divide the two feathers keeping them totally separated one from each other.8. Make a figure eight around the wings with the tying thread. Do some turns on each single wing to set them perpendicular and well separated.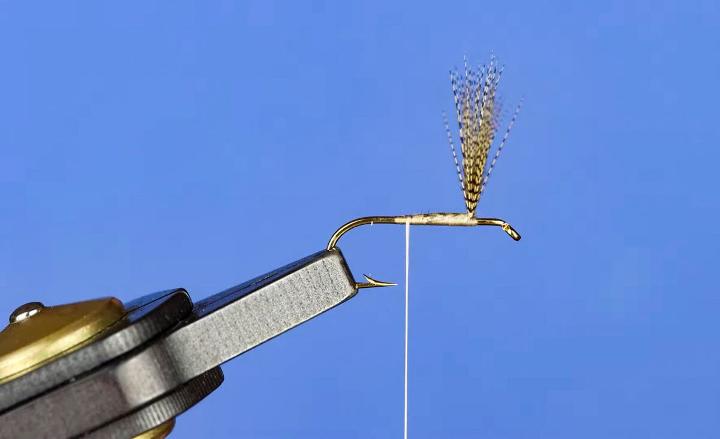 9. Go with thread in the direction of the hook bend, up to the height of the hook point. Now, is time to tie in the tails.
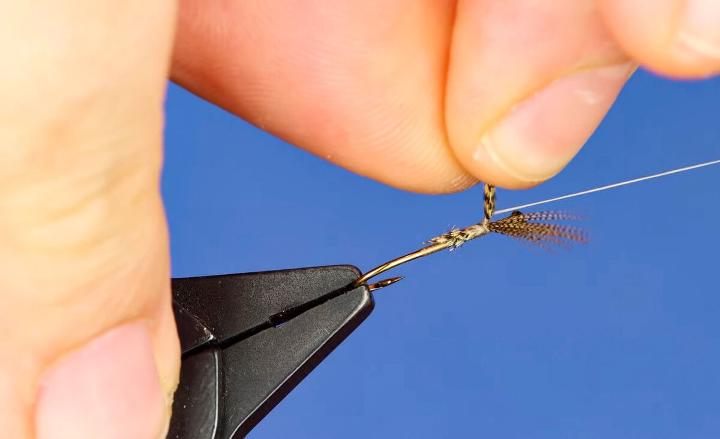
 10. Select a fine dun spade hackle, hard to find on modern capes. Some of them can be found on the Root River Hackle Capes, rich of superb long and stiff hackles, ideal to dress tails. The length of the tail must be the same of the entire hook.
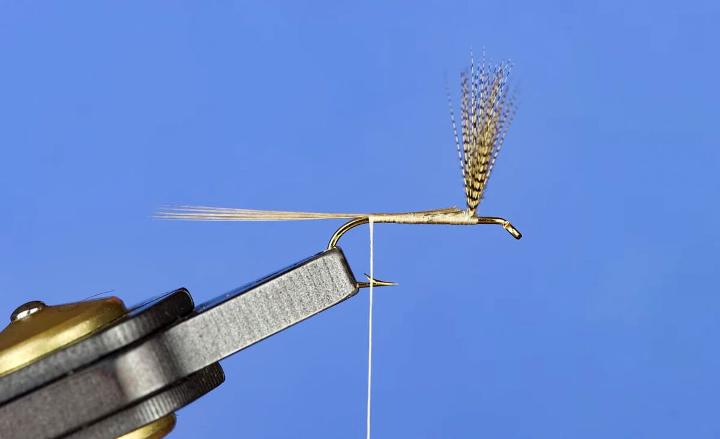 11. Tie in the tails on top of the hook shank, as shown in the picture.
 12. Take a well stripped Rhode Island Red Rooster Hackle. If you are not lucky enough to own it, just use a common brown rooster feather. The result could be slightly different. Tie in the quill at the tail base.
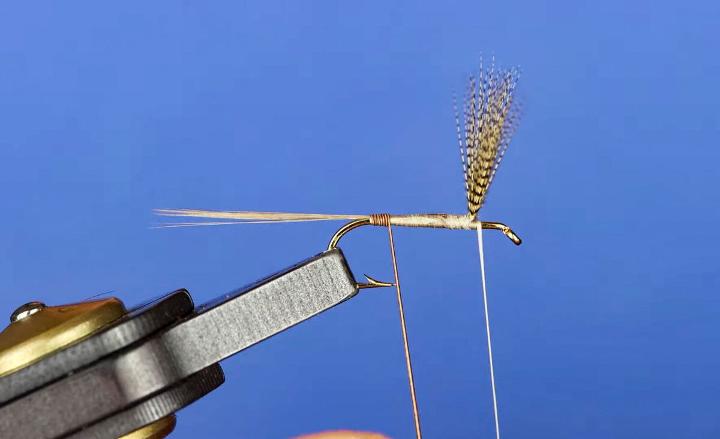 13. Wrap the quill around the hook shank, well tightened, without leaving free spaces.
 14. Go ahead until to wings proximity. Fix the quill with some thread turns and remove the excess.
 15. With a little bit of varnish, cover the body. This will give a shiny look to the fly. Use head cement or a drop of the ultra thin Solarez Bone Dry UV Resin.
 16. Select a fine dun hackle on a Root River Hackle Cape, a bit shorter than wings. Tie in the hackle at the end of the body.
 17. Wrap the hackle forward as shown, first behind, then in front of the wings.
  18. Tie off the hackle, leave some free space behind the hook eye. In the past this was required to tie a Turle Knot and secure the tippet. Trim off the hackle in excess.
  19. Whip finish with a tiny knot.
 20. Apply a tear of varnish to the head, trim off the thread and your Red Quill is ready.
The fly is now ready to fish!
 Remember to remove the barb or tie the fly on a barbless hook!